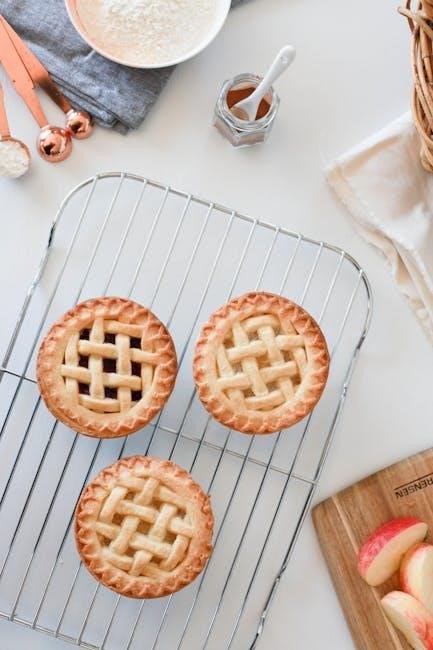
Marie Callender’s frozen pies offer a convenient way to enjoy homemade-quality desserts and meals. With a variety of flavors, they provide a delicious, flaky crust and mouthwatering fillings. Perfect for any occasion, these pies are easy to bake and customizable to suit any taste.
Overview of Marie Callender’s Frozen Pies
Marie Callender’s frozen pies are a beloved choice for both desserts and savory meals, offering a wide variety of flavors to satisfy any craving. From classic apple and pumpkin to chicken pot pie, these pies are crafted with high-quality ingredients and a flaky, homemade-style crust. Designed for convenience, they allow anyone to enjoy a delicious, restaurant-quality meal or dessert without the hassle of from-scratch preparation. The pies are versatile, catering to different tastes and dietary preferences, and are perfect for special occasions or everyday enjoyment. With clear cooking instructions provided, Marie Callender’s frozen pies make it easy for home cooks to achieve perfect results every time. Their popularity stems from their balance of flavor, texture, and ease of preparation, making them a staple in many households. Whether you’re serving a family dinner or hosting guests, Marie Callender’s frozen pies are a reliable and delicious option.
Importance of Following Cooking Instructions
Following the cooking instructions for Marie Callender’s frozen pies is crucial to ensure the best results. Proper thawing, preheating, and baking times are essential to achieve a flaky crust and perfectly cooked filling. Deviating from the instructions can lead to undercooked or burnt pies, compromising both texture and flavor. The recommended oven temperature and baking duration are specifically designed to balance crust crispiness and filling readiness. Additionally, steps like venting the crust and wrapping edges with foil prevent burning and ensure even cooking. Ignoring these guidelines may result in a less-than-desirable outcome. By adhering to the package instructions, you can enjoy a homemade-quality pie with minimal effort. Consistency is key, and following the instructions guarantees a delicious and satisfying experience every time you bake a Marie Callender’s frozen pie.
Preparation Steps
Preparation involves thawing the pie crust, preheating the oven, and handling the crust gently to avoid tears. Proper steps ensure the pie bakes evenly and retains its flaky texture for a delicious result.
Thawing the Pie Crust
Thawing the pie crust is the first step in preparing Marie Callender’s frozen pies. To thaw, place the crust at room temperature for 15-20 minutes until it becomes pliable. Avoid microwaving or thawing in hot water, as this can damage the crust. For best results, keep the crust in its original packaging or cover it with plastic wrap to prevent drying out. If you’re using a double-crust pie, ensure both the top and bottom crusts are thawed evenly. Once thawed, the crust is ready for filling or pre-baking. Always handle the crust gently to avoid tears, as this can affect the pie’s appearance and structure. Proper thawing ensures the crust bakes evenly and maintains its flaky texture. If not using immediately, a thawed crust can be refrigerated for up to 24 hours. Follow package instructions for specific thawing times and methods to achieve the best results.
Preheating the Oven

Preheating the oven is a crucial step when baking Marie Callender’s frozen pies. The oven should be set to the temperature specified on the pie’s packaging, typically ranging from 375°F to 400°F (190°C to 200°C). Ensure the oven is fully preheated before placing the pie inside to guarantee even cooking. For conventional ovens, preheating usually takes about 10-15 minutes, while convection ovens may require slightly less time. Always use an oven thermometer to verify the temperature, as this ensures the pie cooks properly. If you’re baking multiple pies, adjust the racks to allow adequate airflow and prevent overcrowding. Never start baking until the oven has reached the correct temperature, as this can lead to an undercooked crust or uneven filling. Proper preheating is essential for achieving a golden-brown, flaky crust and a perfectly cooked filling. Follow the package instructions precisely for optimal results, and remember to place the pie on a baking sheet to catch any drips during baking.
Handling the Pie Crust
Handling Marie Callender’s frozen pie crust requires care to maintain its integrity and ensure a flaky texture. Always thaw the crust at room temperature for 15-20 minutes or until it becomes pliable. Avoid forcing or stretching the dough, as this can cause tears or unevenness. If the crust is too stiff, allow it to thaw a few more minutes. Lightly flour your work surface and rolling pin to prevent sticking when rolling out the crust. For pre-baked crusts, gently place the thawed dough into a pie dish, pressing it into the corners without stretching. Avoid overworking the dough, as this can make it tough. If using pie weights or beans for pre-baking, ensure they are evenly distributed to prevent the crust from bubbling. After baking, let the crust cool slightly before filling. Handle the crust gently to avoid breaking, especially when transferring it to or from the oven. Proper handling ensures a golden, flaky crust that complements your filling perfectly.
Poking the Crust for Ventilation
Poking the crust is a crucial step to ensure proper ventilation during baking. Before filling or baking, use a fork to gently poke holes across the bottom and sides of the crust. This prevents air bubbles from forming and helps the crust cook evenly. For a thawed crust, poke 3 to 4 times in the center and around the edges to allow steam to escape. Avoid over-poking, as this can weaken the crust and lead to breakage. If pre-baking the crust, poking is especially important to prevent it from puffing up excessively. Use a light touch to maintain the crust’s structure. After poking, ensure the crust is evenly distributed in the pie dish or baking sheet. Proper ventilation ensures a flaky, golden crust and prevents filling leakage during baking. This simple step enhances the overall texture and appearance of the pie, making it a key part of the cooking process. Always handle the poked crust gently to avoid cracks or tears before baking.
Baking the Pie
Bake the pie on a preheated baking sheet at 400°F for 60-65 minutes. Wrap the crust edge with foil to prevent burning. Let it stand for 5 minutes after baking to ensure even cooking and safety.
Placing the Pie on a Baking Sheet
When preparing to bake your Marie Callender’s frozen pie, it is essential to place it on a baking sheet to ensure even cooking and prevent any potential mess from drips. Position the pie in the center of the preheated baking sheet, leaving enough space around it for proper air circulation. Gently handle the pie to avoid damaging the crust, as it may be delicate after thawing. The baking sheet acts as a stable base and helps the pie cook uniformly. Additionally, wrapping the crust edge with foil before placing it on the baking sheet can prevent the edges from burning. Always ensure the baking sheet is placed in the center rack of the oven for optimal results. By following this step, you can achieve a perfectly baked pie with a golden-brown crust and evenly cooked filling. This method also makes it easier to remove the pie from the oven once it’s done baking.
Wrapping the Crust Edge with Foil
Wrapping the crust edge of your Marie Callender’s frozen pie with foil is a crucial step to prevent the edges from burning during baking. To do this, cut a strip of aluminum foil long enough to wrap around the crust edge. Gently press the foil onto the crust, ensuring it adheres securely without stretching or tearing the dough. This step is especially important for pies with intricate crust designs or thinner edges that may cook faster; By protecting the crust edge, you ensure it bakes evenly and retains its golden-brown color. For optimal results, apply the foil before placing the pie on the baking sheet. This simple technique enhances the overall appearance and texture of the pie, making it look and taste like a homemade creation. Properly wrapping the crust edge also prevents it from becoming too dark or crispy, allowing the rest of the pie to cook perfectly. This step is a key part of achieving a professional finish for your frozen pie.
Baking Time and Temperature
Baking your Marie Callender’s frozen pie at the right temperature and for the correct duration is essential for achieving a perfectly cooked crust and filling. Preheat your oven to 400°F (200°C), as specified on the packaging. Place the pie on a baking sheet in the center of the oven to ensure even cooking. For most pies, bake for 60 to 70 minutes, or until the crust is golden brown and the filling is bubbling. If you’re using a pie with a foil-wrapped crust edge, the baking time remains the same. After baking, let the pie stand for 5 minutes before serving to allow the filling to set. Always refer to the package instructions for specific temperature and time guidelines, as they may vary slightly depending on the pie type. Proper baking time and temperature ensure a flaky crust and a deliciously cooked filling, making your Marie Callender’s frozen pie a standout dish.
Checking for Doneness
Checking for doneness is crucial to ensure your Marie Callender’s frozen pie is perfectly cooked. After baking, look for a golden-brown crust and a filling that is bubbly and hot. For fruit pies, the filling should be visibly bubbling through the vents or crust slits. For savory pies, such as chicken or turkey pot pies, the crust should be golden, and the filling should be steaming hot. To verify doneness, you can also check the internal temperature of the filling, which should reach at least 190°F (88°C) for savory pies. Avoid overcooking, as this can cause the crust to burn or the filling to dry out. Once baked, let the pie stand for 5 minutes before serving to allow the filling to set. This ensures a perfectly cooked, flaky crust and a deliciously prepared pie every time. Proper doneness checks guarantee a satisfying result for your Marie Callender’s frozen pie.
Post-Baking Care
After baking, let the pie stand for 5 minutes to complete cooking. Handle carefully, as the pie will be hot. Allowing it to rest ensures the filling sets properly and the crust retains its texture.
Letting the Pie Stand
Letting the pie stand after baking is crucial for achieving the perfect texture and structure. Once baked, remove the pie from the oven and place it on a wire rack or heat-resistant surface to cool. This step allows the filling to set, preventing it from being runny or overly liquid. For optimal results, let the pie stand for 5 minutes before serving. This brief cooling period ensures the crust remains crispy and the filling is evenly distributed. Additionally, allowing the pie to rest helps prevent burns, as the internal temperature will still be high immediately after baking. Patience during this step will result in a more enjoyable and visually appealing dessert or meal. Always handle the pie carefully, as it will still be hot during the standing time. This simple step is essential for a successful baking experience with Marie Callender’s frozen pies.
Serving the Pie
Serving the pie is the final step in enjoying your perfectly baked Marie Callender’s frozen pie. Once the pie has stood for the recommended time, it is ready to be served. Use a sharp knife or spatula to carefully portion the pie into slices, ensuring even distribution of the filling. For a polished presentation, place the slices on individual plates or a serving dish. Consider adding a dollop of whipped cream, a scoop of vanilla ice cream, or a sprinkle of fresh fruit to enhance both the flavor and visual appeal. If serving a savory pie, a side salad or warm vegetables can complement the dish nicely. Always handle the pie with care, as it may still be warm. Letting it cool slightly before serving helps prevent burns and ensures a safe dining experience. By following these simple steps, you can present a delicious and professional-looking pie that is sure to impress your family and guests.
Microwave Instructions
Cook Marie Callender’s frozen pies in the microwave for 8-10 minutes at 1000+ watts. Let stand 5 minutes after cooking to ensure even heating and a flaky crust. Follow package instructions for best results.
Microwave Cooking Time and Wattage
For optimal results, cook Marie Callender’s frozen pies in a microwave with a minimum of 1000 watts. Cook on high for 8 to 10 minutes. After cooking, let the pie stand for 5 minutes to ensure even heating and a crispy crust. Always follow package instructions for specific guidelines, as cooking times may vary slightly depending on the pie type. For safety, handle the hot pie with care and check for doneness before serving. This method ensures a delicious, evenly cooked pie with a flaky crust and well-heated filling.
Standing Time After Microwaving
After microwaving Marie Callender’s frozen pie, it’s essential to let it stand for 5 minutes before serving. This standing time allows the filling to set and the crust to crisp up slightly. The heat will continue to distribute evenly during this period, ensuring the pie is thoroughly cooked and the flavors are well-balanced. Always handle the pie carefully, as it will remain hot. Check the pie for doneness after the standing time, ensuring the crust is golden and the filling is heated through. This step is crucial for achieving the perfect texture and preventing a runny or undercooked center. By allowing the pie to stand, you ensure a delicious and satisfying result every time. Remember, patience is key to enjoying a perfectly cooked Marie Callender’s frozen pie.
Special Considerations
Marie Callender’s frozen pies require attention to crust care and filling variations. Different pie types may need adjusted cooking times, and optional egg wash enhances crust appearance. Use pie weights for pre-baking to prevent shrinking and ensure flaky texture.
Differences in Cooking Various Pie Types
Different types of Marie Callender’s frozen pies require specific cooking adjustments. Fruit pies typically bake at 375°F for 60-70 minutes, while pot pies need higher temperatures, around 400°F for 50-60 minutes. Savory pies, like chicken or shepherd’s pie, may require similar temperatures to pot pies but shorter baking times. It’s crucial to follow the package instructions for each type, as fillings vary in density and moisture content. Fruit pies may need venting to prevent bursting, while savory pies often require foil wrapping around the crust edges to prevent over-browning. Additionally, some pies may need a longer standing time after baking to ensure the filling sets properly. Always check for doneness by looking for a golden-brown crust and a heated-through filling. Adjustments may also be needed for microwave cooking, with fruit pies typically requiring 8-10 minutes and savory pies needing slightly longer times, ensuring even heating throughout.
Crust Care Tips
Proper care of the crust is essential for achieving a flaky and golden result when baking Marie Callender’s frozen pies. Always thaw the crust at room temperature for 15-20 minutes to ensure pliability. Avoid direct sunlight or heat, as this can cause the crust to soften unevenly. When handling the crust, be gentle to prevent stretching or tearing, which can lead to shrinkage during baking. For pre-baked crusts, lightly prick the bottom with a fork to prevent air bubbles from forming. To avoid over-browning, wrap the crust edges with foil during the initial baking phase. If desired, brush the crust with an egg wash for a shiny finish. After baking, allow the crust to cool slightly before serving to ensure it retains its shape. Proper crust care enhances both the texture and appearance of your pie, making it a delicious and visually appealing treat for any occasion.
Optional Egg Wash for Crust
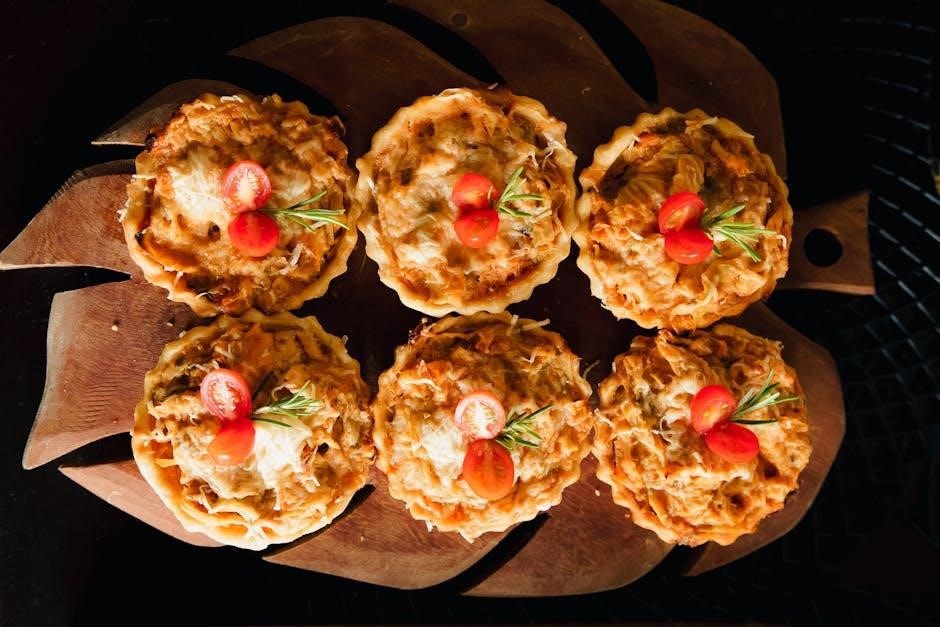
An optional egg wash can be applied to the crust of Marie Callender’s frozen pies for a golden-brown finish. Simply mix one large egg with one tablespoon of water until well combined. Using a pastry brush, gently apply the egg wash to the crust edges and surface before baking. This step adds a rich, shiny appearance and enhances flavor. Ensure the crust is fully thawed and pliable before applying the wash. For pre-baked crusts, apply the egg wash after pricking the surface with a fork to prevent air bubbles. Bake according to package instructions, typically at 375-400°F, until the crust is golden. Avoid over-brushing, as excess egg wash can pool at the crust’s edges. This technique is particularly effective for savory pies like chicken pot pie or quiche, giving the crust a polished look. The egg wash is entirely optional, so feel free to skip it for a more rustic appearance.
Marie Callender’s frozen pies offer a delicious, homemade taste with minimal effort. By following the instructions and tips provided, you can achieve perfectly baked pies every time. Enjoy your baking journey and savor the flaky crust goodness!
Cooking Marie Callender’s frozen pies involves a straightforward process that ensures a delicious outcome. Start by thawing the pie crust at room temperature until pliable, typically 15-20 minutes. Preheat your oven to the temperature specified on the packaging, usually between 375°F and 400°F. Place the pie on a baking sheet, optionally wrapping the crust edge with foil to prevent over-browning. Bake for the recommended time, usually 60-70 minutes, until the crust is golden brown and the filling is cooked through. For microwave cooking, ensure your microwave is at least 1000 watts and cook for 8-10 minutes, letting it stand for 5 minutes afterward. Always follow the package instructions for specific pie types, as cooking times may vary. After baking, let the pie stand for a few minutes to complete the cooking process. By adhering to these steps, you can achieve a perfectly baked pie with a flaky crust and flavorful filling.
Final Tips for Successful Pie Cooking
To ensure the best results when cooking Marie Callender’s frozen pies, consider a few key tips. Always preheat your oven to the recommended temperature, as this helps the crust bake evenly. Use a baking sheet to catch any drips and prevent mess. For a golden-brown crust, avoid opening the oven door too often during baking. If using a microwave, ensure it meets the minimum wattage requirement for even cooking. Letting the pie stand after cooking allows the filling to set properly, making it easier to serve. Additionally, handle the hot pie carefully to avoid burns. For an extra touch, brush the crust with an egg wash before baking for added shine. Finally, check the pie’s doneness by ensuring the crust is golden and the filling is bubbly. By following these tips, you’ll achieve a perfectly cooked pie with a flaky crust and delicious filling every time.