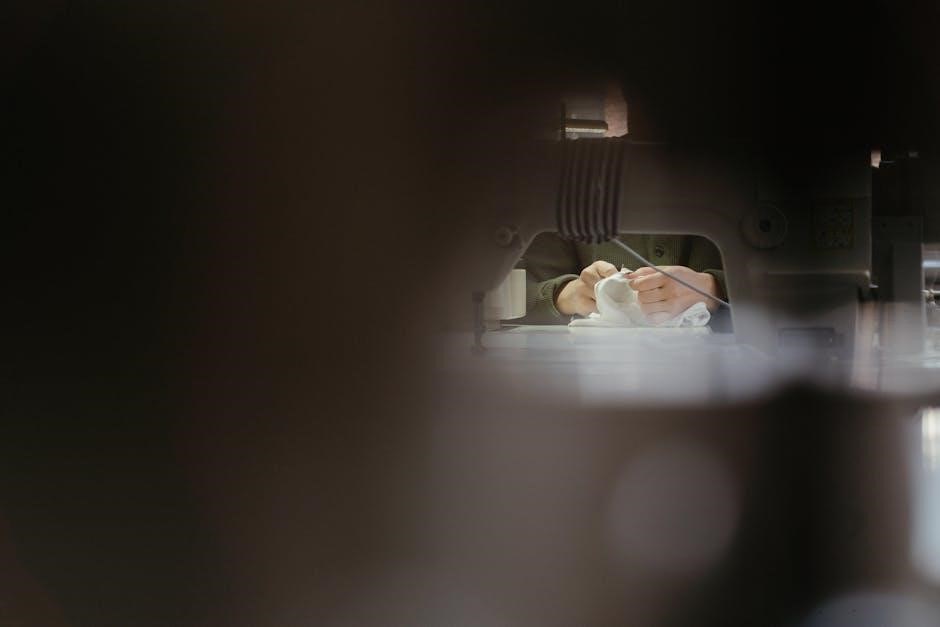
A handheld sewing machine is a portable, versatile tool designed for quick repairs and small projects․ It offers convenience and ease of use, with guides available online for operation and maintenance․ These devices are perfect for sewing on the go, making them ideal for crafters and DIY enthusiasts․ Always refer to the user manual for safety and setup instructions to ensure optimal performance․ Popular models include the Handy Stitch and Singer Start 1306, with detailed PDF manuals widely accessible for troubleshooting and threading assistance․
1․1 What Is a Handheld Sewing Machine?
A handheld sewing machine is a compact, portable device designed for small-scale sewing tasks․ It operates with a rechargeable battery or USB power, offering convenience for quick repairs or crafting․ Unlike traditional machines, it is lightweight and easy to maneuver, making it ideal for stitching straight lines on various fabrics․ Often used for DIY projects, it comes with basic features like adjustable stitch length and a built-in needle․ User manuals, such as the Handy Stitch or Singer Start 1306 guides, provide detailed instructions for operation and maintenance․ Its portability and simplicity make it a popular choice for beginners and hobbyists alike․
1․2 Benefits of Using a Handheld Sewing Machine
A handheld sewing machine offers unmatched portability and convenience, making it perfect for quick repairs or small projects․ Its lightweight design allows for easy maneuverability, enabling precise stitching on various fabrics․ Ideal for both beginners and experienced users, it simplifies tasks like hemming or patching․ The device is also cost-effective and requires minimal setup, with user manuals like the Handy Stitch or Singer Start 1306 providing clear instructions․ This tool is a practical addition to any sewing kit, offering versatility and ease of use for crafting and DIY enthusiasts․
Safety Precautions
Always follow safety guidelines to reduce risks of burns, fire, or electric shock․ Keep the manual handy for emergency instructions and proper usage tips․
2․1 General Safety Guidelines
Always read the user manual carefully before using the handheld sewing machine․ Ensure you understand all safety precautions to avoid accidents․ Keep the machine out of reach of children and supervise its use by individuals under 18․ Use the device on a stable, flat surface and avoid sewing near open flames or sparks․ Never touch electrical parts with wet hands, and avoid sewing in humid environments․ Use only recommended needles and threads to prevent malfunctions․ Keep loose clothing and long hair tied back while operating the machine․
2․2 Reducing the Risk of Burns, Fire, or Electric Shock
To minimize risks, ensure your handheld sewing machine is used in a well-ventilated area and avoid flammable materials․ Prevent overheating by using the correct needle and thread size, and keep the machine dry to avoid electric shock․ Regular maintenance, such as cleaning and checking for blockages, can help prevent malfunctions․ Supervise the machine when in use and keep it on a stable surface․ Refer to your device’s manual for specific safety guidelines, such as those found in the Handy Stitch or Singer Start 1306 manuals, to ensure safe operation and prevent potential hazards․
Understanding the Machine Components
A handheld sewing machine includes a needle, power button, and spool․ The needle must be installed with the flat side facing forward․ Proper component knowledge aids in troubleshooting and maintenance, ensuring safe and efficient operation, as outlined in manuals like the Handy Stitch guide․
3․1 Parts of a Handheld Sewing Machine
A handheld sewing machine typically consists of a compact body, a rotating wheel, a needle, and a spool for thread․ The power button controls operation, while the needle bar holds the sewing needle․ Some models include an LED light for visibility․ The flat side of the needle shank must face forward during installation․ Accessories like additional needles and threads are essential for optimal performance․ Always refer to the PDF manual for specific part locations and usage guidelines to ensure safety and proper function․
3․2 Importance of the Needle and Its Installation
The needle is a critical component of a handheld sewing machine, ensuring proper stitching and fabric penetration․ Correct installation is essential; the flat side of the needle shank must face forward to maintain balance and prevent breakage․ Using a standard sewing machine needle, such as a 14 style DHx1, is recommended for optimal performance․ Improper installation can lead to uneven stitches or machine malfunction․ Always refer to the PDF manual for detailed installation instructions to guarantee smooth operation and extend the machine’s lifespan․ Regularly check and replace the needle as needed to maintain sewing quality․
Threading the Machine
Proper threading is essential for smooth operation․ Follow step-by-step guides in the PDF manual to ensure correct thread placement and tension, avoiding jams or breakage․
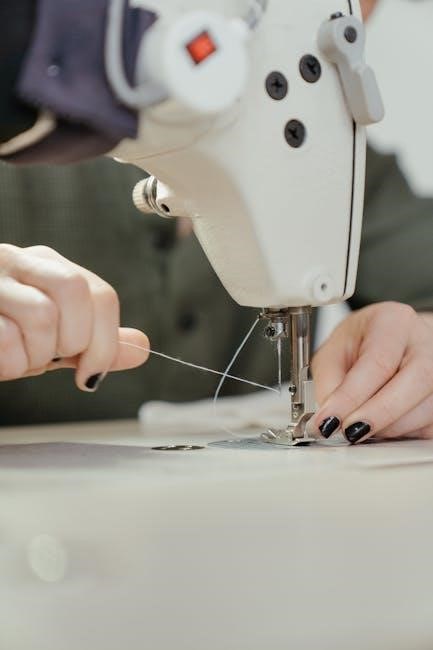
4․1 Step-by-Step Threading Instructions
Begin by inserting the thread into the machine’s tension guides, ensuring it passes through each slot smoothly․ Loop the thread around the take-up lever and pull gently to secure it․ Guide the thread through the needle eye, leaving a small tail․ Tighten the needle screw firmly to hold the thread in place․ Refer to the handheld sewing machine instructions PDF for visual aids․ Proper threading ensures consistent stitches and prevents jams․ Always use a high-quality thread and the recommended 14 style DHx1 needle for optimal performance․ Keep the work area clear to avoid tangling the thread during use․
4․2 Common Threading Mistakes to Avoid
Common threading mistakes include not inserting the thread correctly through the tension guides, which can cause uneven stitches․ Forgetting to loop the thread around the take-up lever may lead to loose stitching․ Another error is improperly securing the thread tail, resulting in it coming loose during sewing․ Using the wrong needle size or type, such as not using a 14 style DHx1 needle, can cause thread breakage․ Additionally, overtightening the needle screw may damage the machine or thread․ Always refer to the handheld sewing machine instructions PDF for proper techniques to avoid these issues and ensure smooth operation․
Sewing Basics
Mastering straight stitches is essential for beginners․ Start with a steady hand, apply gentle pressure, and maintain consistent fabric tension․ Use the handheld sewing machine instructions PDF for guidance on basic stitches and fabric handling․
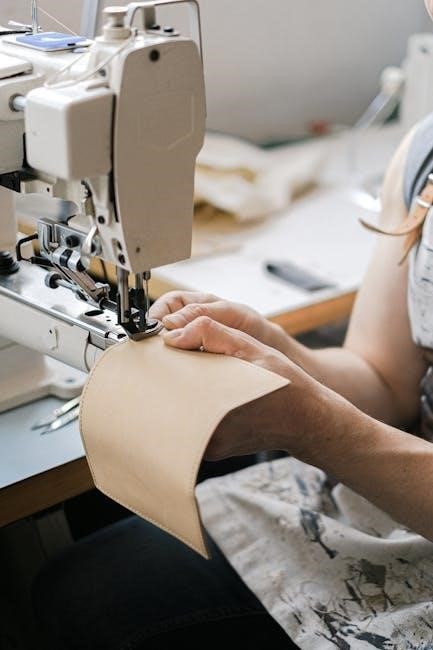
5․1 How to Sew Straight Stitches
To sew straight stitches with a handheld machine, ensure the needle is properly installed with the flat side facing forward․ Thread the machine as per the instructions, then place the fabric under the needle․ Gently squeeze the trigger and move the fabric steadily in a straight line․ Maintain even tension and avoid pulling too hard to prevent thread breakage․ Refer to the Handheld Sewing Machine Instructions PDF for detailed steps and troubleshooting tips to achieve consistent results․ Practice on scrap fabric to build confidence and control․ Always follow safety guidelines to avoid accidents․ For additional guidance, consult the user manual for specific model instructions, such as the Handy Stitch or Singer Start 1306, which provide comprehensive guides on sewing techniques and maintenance․ By following these steps, you can master the basics of sewing straight stitches efficiently․
5․2 Tips for Sewing Different Fabrics
When sewing various fabrics with a handheld machine, choose the right needle size and type for the material․ Use a heavier needle for thick fabrics like denim and a finer one for delicate materials․ Adjust stitch length and tension as needed to prevent thread breakage․ For slippery fabrics, use a walking foot or Teflon foot for better control․ Pre-wash fabrics to avoid shrinkage and ensure accurate fit․ Refer to the Handheld Sewing Machine Instructions PDF for specific guidance on sewing different textures, such as cotton, silk, or stretch fabrics․ Always test stitches on scrap fabric first․ For detailed instructions, consult models like the Handy Stitch or Singer Start 1306 manuals, which offer tailored advice for various materials․ This ensures optimal results and extends the machine’s versatility․ Proper fabric handling and machine setup are key to achieving professional-looking seams․
Advanced Sewing Techniques
Master backstitching and reinforcing stitches for durable seams․ Use the right needles for heavy fabrics and delicate materials․ Refer to the Handheld Sewing Machine Instructions PDF for expert tips․
6․1 Backstitching for Stronger Seams
Backstitching is essential for creating durable seams․ Start by sewing forward a few stitches, then reverse for a strong anchor․ Use a 14-style DHx1 needle for heavy fabrics․ Keep the machine steady and maintain consistent tension to avoid thread breakage․ Refer to the Handheld Sewing Machine Instructions PDF for visual guides; This technique ensures seams are secure, especially for thicker materials or high-stress areas․ Practice on scrap fabric to master the backstitch before working on actual projects․ Regularly clean the machine to prevent jamming during this process․ Always follow safety guidelines to avoid accidents during stitching․ Use the correct thread type to match fabric weight for optimal results․ By perfecting the backstitch, you can achieve professional-looking seams with ease․ This method is particularly useful for reinforcing stress points in garments or home decor items․ Keep the workspace well-lit to monitor stitching accuracy․ Store the machine properly after use to maintain its performance․ Experiment with different fabrics to understand how backstitching adapts to various textures․ This technique is a cornerstone of advanced sewing with handheld machines, offering both strength and versatility․ For detailed instructions, consult the user manual or online tutorials․ Happy sewing!
6․2 Reinforcing Stitches for Durable Results
Reinforcing stitches ensures long-lasting results․ Use multiple forward and backward passes to strengthen seams․ For thicker fabrics, consider using a heavy-duty needle․ Maintain consistent tension and speed to prevent thread breakage․ Refer to the Handheld Sewing Machine Instructions PDF for guidance․ Overlapping stitches at the beginning and end of seams adds extra durability․ This technique is ideal for stress points like buttonholes or pockets․ Regular cleaning of the machine prevents jams during this process․ Always follow safety guidelines to avoid accidents while stitching․ Using the correct thread type ensures optimal results․ Reinforcing stitches is especially useful for heavy-duty projects, providing both strength and reliability․ Keep your workspace organized to maintain focus during stitching․ Store the machine properly after use to preserve its functionality․ Experiment with different stitch patterns to enhance durability․ For detailed instructions, consult the user manual or online resources․ This method enhances the overall quality of your sewing projects, making them more robust and long-lasting․ Proper technique ensures professional-looking results, even for beginners․ Happy sewing!
Troubleshooting Common Issues
Common issues include thread breakage or machine jams․ Check power sources, thread tension, and needle alignment․ Clean the machine regularly to prevent dust buildup․ Refer to the Handheld Sewing Machine Instructions PDF for specific solutions and maintenance tips to ensure smooth operation․ Always follow safety guidelines to avoid accidents during troubleshooting․ Proper care extends the machine’s lifespan and performance․ Consult the manual for detailed repair guidance․ Regularly inspect for worn parts and replace them as needed․ Keep the workspace tidy to avoid losing small components․ For persistent issues, contact customer support or a professional technician․ Troubleshooting ensures optimal functionality and longevity of your handheld sewing machine․ Happy sewing!
7․1 Machine Not Turning On
If your handheld sewing machine fails to turn on, first check the power source․ Ensure the battery is fully charged or the power cord is securely connected․ Verify that the power button is functioning properly․ Consult the Handheld Sewing Machine Instructions PDF for specific troubleshooting steps․ Ensure no debris or dust is blocking internal components․ If using a cord, check for damage or loose connections․ Reset the machine by turning it off and on again․ If issues persist, refer to the manual or contact customer support for assistance․ Always follow safety guidelines during troubleshooting․ Proper maintenance can prevent such issues․ Regularly inspect and clean the machine to ensure smooth operation․ Keep the user manual handy for quick reference․ Troubleshooting early can prevent further complications․ Stay safe while resolving the issue․ Happy sewing!
7․2 Thread Breaking or Jamming
If the thread breaks or jams frequently, inspect the installation․ Ensure the needle is correctly inserted with the flat side facing forward․ Check the thread tension and adjust as needed․ Avoid using damaged or low-quality thread․ Clear any debris from the machine’s interior․ If fabric is too thick, it may cause jams; use appropriate fabric for the machine․ Regularly clean the machine to prevent dust buildup․ Refer to the Handheld Sewing Machine Instructions PDF for threading guides and troubleshooting tips․ Proper maintenance can minimize thread issues and ensure smooth stitching․ Always follow safety precautions when handling sharp parts․ Happy sewing!
Maintenance and Care
Regular cleaning with a soft cloth and avoiding harsh chemicals are essential․ Store the machine properly in a dry place to maintain its performance and longevity․
8․1 Cleaning the Machine
Regular cleaning is essential for maintaining your handheld sewing machine’s performance․ Use a soft, dry cloth to wipe away dust, thread fragments, and debris from the exterior and needle area․ Avoid using harsh chemicals or moistened cloths, as they may damage the machine․ Gently brush out any lint or loose threads from the interior․ Ensure the machine is dry before storing it․ Refer to your handheld sewing machine instructions PDF for specific cleaning recommendations tailored to your model to prevent damage and ensure longevity․
8․2 Storing the Machine Properly
Proper storage is crucial to protect your handheld sewing machine from damage․ Store it in a protective case or pouch to prevent scratches and dust accumulation․ Keep the machine in a dry, cool place away from direct sunlight and moisture․ Ensure the needle is removed and the power cord is securely wrapped to avoid tangling․ Refer to the handheld sewing machine instructions PDF for specific storage recommendations, as improper handling can lead to mechanical issues․ Regularly inspect stored components to maintain functionality and longevity․
Choosing the Right Accessories
Selecting the right needles and threads is essential for optimal performance․ Use a 14 style DHx1 sewing needle and high-quality threads suitable for your fabric type․ Optional attachments enhance versatility, allowing for various stitching techniques and fabric handling․ Always refer to the handheld sewing machine instructions PDF for compatibility and recommendations to ensure the best results for your projects․
9․1 Recommended Needles and Threads
Using the correct needle and thread is crucial for smooth operation․ A 14 style DHx1 sewing needle is recommended for handheld machines, as it ensures proper stitching and durability․ The needle must be installed with the flat side facing forward․ For threads, choose high-quality cotton, polyester, or blended options suitable for your fabric type․ Avoid using low-grade threads, as they can cause breakage or jams․ Always refer to the handheld sewing machine instructions PDF for specific recommendations tailored to your machine and fabric needs․
9․2 Optional Attachments for Versatility
Optional attachments can enhance the functionality of your handheld sewing machine․ Accessories like presser feet, zipper feet, or extension trays allow for more precise stitching and versatility․ These attachments are often available in the handheld sewing machine instructions PDF or can be purchased separately․ They enable tasks such as sewing zippers, creating hems, or working with thicker fabrics․ Always ensure compatibility with your machine model, as specified in the user manual․ Exploring these attachments can expand your creative possibilities and improve sewing efficiency for various projects․
User Manual Overview
The handheld sewing machine instructions PDF serves as a comprehensive guide, detailing safety precautions, machine setup, and operation․ It includes troubleshooting tips, maintenance advice, and warranty information, ensuring users understand their device fully․ Available in digital formats, the manual is easily accessible for reference․ Always read it carefully to optimize your sewing experience and maintain the machine’s performance over time․ This resource is essential for both beginners and experienced users, providing clear, step-by-step instructions for every aspect of machine operation․
10․1 Key Sections of the Instruction Manual
The handheld sewing machine instructions PDF includes essential sections like safety guidelines, machine setup, and operation․ It covers threading techniques, stitch selection, and troubleshooting common issues like thread breaking or jamming․ Maintenance tips, such as cleaning and storing the device, are also provided․ The manual often features diagrams and step-by-step instructions for clarity․ Additionally, it includes information on compatible accessories and needles, ensuring users can optimize their sewing experience․ These sections are designed to help both beginners and experienced users understand and utilize the machine effectively, promoting safe and efficient operation․
10․2 How to Read and Interpret the Manual
Reading the manual carefully is crucial for understanding your handheld sewing machine․ Start by reviewing safety guidelines and setup instructions․ Pay attention to diagrams and step-by-step guides for threading and operation․ Familiarize yourself with symbols and terminology used throughout the document․ Always follow the recommended sequence for troubleshooting common issues like thread jams or machine malfunctions․ Refer to specific sections for maintenance, stitch selection, and accessory usage․ Understanding the manual ensures safe and effective operation, helping you maximize the machine’s potential for various sewing tasks and projects․

Portable Sewing Solutions
Handheld sewing machines offer portable solutions for quick repairs and small projects․ Their compact design allows sewing on the go, making them ideal for crafters and DIY enthusiasts․
11․1 Advantages of Portability
Handheld sewing machines are lightweight and compact, making them easy to carry anywhere․ Their portability allows for sewing in various settings, from home to travel or outdoor activities․ This convenience is ideal for crafters, DIY enthusiasts, and professionals needing on-site repairs․ The ability to sew on the go enhances creativity and efficiency, ensuring projects can be completed without being tied to a fixed workspace․ Additionally, portability makes these machines perfect for small, quick tasks that require immediate attention․ They are versatile tools that adapt to any environment, providing unmatched flexibility for users․
11․2 Tips for Sewing on the Go
For sewing on the go, always carry a small kit with essentials like needles, threads, and fabric scraps․ Use a portable power source or batteries to ensure uninterrupted operation․ Pre-thread the machine before heading out to save time․ Choose lightweight, easy-to-handle fabrics to simplify the process․ Practice safety by keeping the workspace well-lit and clear of distractions․ Regularly check the needle and thread for breakage to avoid mid-task interruptions․ These tips ensure efficient and enjoyable sewing experiences while traveling or working remotely with your handheld machine․
Mastering a handheld sewing machine requires patience and practice․ Always follow safety guidelines and refer to the manual for troubleshooting․ Experiment with different fabrics and techniques to enhance your skills․ Keep your machine well-maintained and store it properly․ With consistent use, you’ll achieve professional results and enjoy the convenience of portable sewing․ Happy stitching!
12․1 Final Tips for Successful Sewing
To achieve the best results with your handheld sewing machine, always follow the manufacturer’s instructions and practice on scrap fabric․ Regularly clean and maintain the machine to ensure smooth operation․ Use high-quality threads and needles suitable for your fabric type․ Keep the machine stored in a dry, cool place when not in use․ Experiment with different stitching techniques to enhance your projects․ Most importantly, stay patient and creative, as mastery takes time․ Happy sewing!
12․2 Encouragement to Practice and Experiment
Embrace creativity and don’t hesitate to try new techniques with your handheld sewing machine․ Experimenting with different fabrics and stitches can lead to exciting results․ Start with simple projects and gradually tackle more complex ones․ Remember, every stitch is a learning opportunity․ Refer to your PDF manual for guidance and troubleshooting tips․ Sewing is a skill that improves with practice, so keep exploring and pushing your creative boundaries․ Happy sewing, and enjoy the journey of creating something unique with every stitch!