Discover the essential steps and safety guidelines for securely mounting your TV. This guide ensures a professional finish, optimal viewing, and enhanced home aesthetics while prioritizing safety.
Purpose of the Guide
This guide provides comprehensive instructions for safely and effectively installing a TV wall mount. It covers essential steps, safety precautions, and best practices to ensure a secure and professional-looking installation. The guide emphasizes understanding your TV and wall type, using proper tools, and following manufacturer instructions. By adhering to this guide, you can achieve optimal viewing angles, enhance your home’s aesthetics, and ensure the longevity of your TV and wall mount setup.
Key Benefits of Wall Mounting Your TV
Wall mounting your TV offers numerous advantages, including space-saving, improved viewing angles, and enhanced aesthetics. It reduces clutter, creating a sleek, modern look in any room. By elevating the screen to an optimal height, it minimizes glare and strain on the eyes. Additionally, wall mounting can prevent accidental tipping, ensuring safety, especially in homes with children or pets. This method also allows for better cable management, contributing to a neater and more organized entertainment setup.
Preparation for Installation
Ensure you have the correct tools, read the manual, and verify your TV’s compatibility with the mount. Check the wall’s weight capacity and plan the layout carefully.
Tools and Materials Required
To ensure a smooth installation, gather essential tools: a stud finder, drill, level, screwdrivers, wrench, and measuring tape. Materials needed include lag screws, washers, wall anchors, and spacers; Verify compatibility with your TV and mount by checking the VESA pattern and weight capacity. Double-check the installation manual for specific hardware requirements to avoid missing any components. Proper preparation ensures a secure and stable mount for your TV.
Understanding TV and Wall Types
Identify your TV type (LED, OLED, or QLED) and VESA pattern for compatibility with the mount. Walls can be stud, brick, or plaster, requiring specific hardware like lag screws or anchors; For stud walls, locate the studs using a stud finder. Brick or plaster walls may need specialized tools and anchors for stability. Ensure the mount supports your TV’s weight and size. Always verify the wall type and TV specifications to choose the right mounting solution for a secure installation.
Reading the Installation Manual
Before starting, thoroughly read the installation manual to understand specific requirements for your TV and wall mount. Ensure compatibility by verifying VESA patterns and weight limits. Familiarize yourself with recommended tools and hardware, such as lag screws for stud walls or anchors for brick. Follow safety precautions and warnings to avoid damage or injury. If instructions are unclear, consult a professional. Proper preparation ensures a secure and successful installation, so take the time to review all details carefully.

Installing the Wall Plate
Begin by locating wall studs and drilling pilot holes. Secure the wall plate using lag screws and washers, ensuring stability. For brick or plaster walls, specialized anchors may be required. Tighten screws firmly to guarantee a sturdy base for your TV mount. Always follow the manufacturer’s instructions for proper installation.
Locating Wall Studs
Locating wall studs is crucial for a secure installation. Use a stud finder or knock gently on the wall to identify sturdy wooden frames. Typically, studs are spaced 16 inches apart. For brick or plaster walls, specialized anchors may be needed. Mark the area clearly and double-check with a drill bit to ensure accuracy. Proper stud alignment ensures the wall plate is stable and can support the TV’s weight safely.
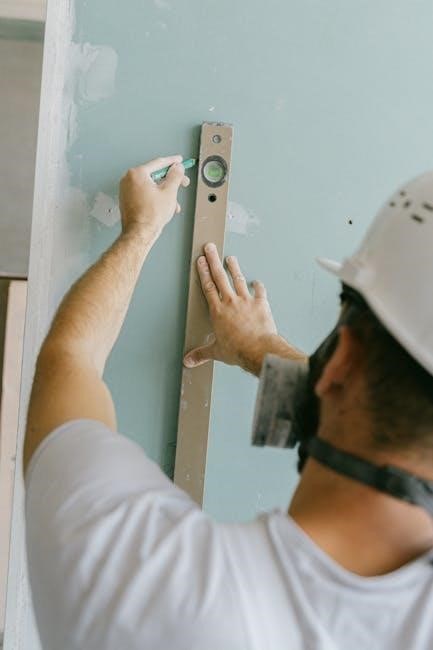
Drilling and Anchoring
Drill pilot holes into the wall at marked stud locations using a drill bit slightly smaller than the anchors. For wood studs, use lag screws with washers. For brick or plaster walls, insert concrete anchors first. Gently hammer anchors into place, ensuring they’re flush with the wall surface. Tighten screws firmly but avoid over-tightening, which can damage the wall or mount. Double-check all anchors for stability before proceeding to secure the wall plate.
Securing the Wall Plate
Align the wall plate with the drilled pilot holes, ensuring it’s level. Insert the lag screws through the plate and into the wall anchors or studs. Tighten the screws gradually, alternating sides to maintain balance. Use a wrench or screwdriver to secure the plate firmly, but avoid overtightening, which could damage the wall or strip the screws. Once the plate is snug, double-check its stability by gently tugging on it. A secure wall plate is essential for safely supporting the TV’s weight.
Attaching the TV to the Mount
Attach the mounting brackets to the TV’s VESA pattern, ensuring they are securely fastened. Align the brackets with the wall plate and connect them firmly to support the TV’s weight safely.
Understanding VESA Patterns
Verify the VESA (Video Electronics Standards Association) pattern on your TV by checking the mounting holes on the back. Common patterns include 200×200, 400×400, and 600x400mm. Ensure the mount’s bracket matches the TV’s VESA pattern for compatibility. Misalignment can lead to improper fitting or damage. Refer to the TV’s manual or manufacturer’s specifications to confirm the correct pattern before attaching the brackets to ensure a secure and stable installation.
Mounting Brackets to the TV
Begin by aligning the mounting brackets with the VESA pattern on the back of your TV. Use the provided screws (typically M4 or M6) to secure the brackets tightly. Ensure the brackets are evenly spaced and aligned with the TV’s mounting holes. Gently tighten the screws to avoid damaging the TV’s mounting points. Double-check that the brackets are firmly attached and the TV is properly aligned before proceeding to the next steps. Handle the TV with care to prevent accidental damage or injury. If unsure, consider seeking assistance to ensure a secure fit.
Connecting the TV to the Wall Plate
Once the TV brackets are securely attached, carefully lift the TV and align the brackets with the wall plate. Gently lower the TV onto the wall plate, ensuring the hooks or mounting bar click securely into place. Tighten the screws or locking mechanisms provided to hold the TV firmly against the wall. Avoid overtightening, as this could damage the TV or mount. Double-check that all connections are secure and the TV is evenly balanced before releasing it. Ensure stability and safety before proceeding.
Hanging and Adjusting the TV
With the TV attached to the mount, carefully lift and position it, ensuring it is level using a spirit level. Secure the TV firmly to the wall plate for optimal stability and safety;
Lifting and Positioning the TV
Lift the TV carefully with at least two people to avoid straining or damaging the device. Use straps or handles provided for secure grip. Align the TV mount brackets with the wall plate, ensuring proper alignment. Gently lower the TV onto the mount, checking for levelness using a spirit level. Adjust horizontally or vertically as needed for perfect positioning. Ensure the TV is centered and evenly balanced before securing. Always double-check the bolts and connections for stability.
Tightening and Securing the TV
Tighten all screws and bolts securely using an Allen wrench or screwdriver. Ensure the TV is level and evenly balanced. Double-check the connections between the TV and wall plate, making sure they are snug but not over-tightened. Verify that the weight limit of the mount is not exceeded. Once secured, gently pull on the TV to ensure stability. Finally, confirm all screws are tightened firmly to prevent any movement or shifting over time.
Final Adjustments and Alignment
After securing the TV, use a level tool to ensure perfect alignment. Fine-tune the TV’s position by adjusting the mount’s tilt, swivel, or rotation features. Verify that the screen is straight and evenly aligned with the wall. Check for any remaining wobble or instability and make necessary adjustments. Finally, ensure all cables are neatly managed and the TV is ready for use, providing a polished and professional appearance.
Post-Installation Checks
Verify the TV’s stability, ensure weight capacity is not exceeded, and check all connections for security. Confirm proper alignment and leveling for optimal viewing and safety.
Testing Weight Capacity
Ensure the TV mount supports the television’s weight by checking the manufacturer’s specified load capacity. Gradually add weight to the mounted TV while observing for any instability or hardware strain. Verify that the mount remains secure and level, with no signs of bending or loosening. Exceeding the weight limit can lead to structural failure, so always adhere to the recommended maximum load. If unsure, consult a professional to confirm the installation’s safety and integrity.
Ensuring Stability and Leveling
Use a spirit level to verify the TV mount is perfectly horizontal and vertical. After mounting, gently rock the TV to ensure it’s securely fastened and doesn’t shift. Adjust the mounting brackets as needed to achieve proper alignment. Double-check all screws and connections for tightness. If the TV tilts or wobbles, re-examine the installation and make necessary adjustments. A stable and level installation ensures optimal viewing and prevents potential damage or safety hazards.
Verifying All Connections
Check all screws on the wall plate and mounting brackets to ensure they are tightened firmly. Verify that the TV is securely attached to the mount and that all cables are properly connected. Double-check the VESA pattern alignment and ensure the TV does not wobble or shift. If any connections feel loose, tighten them immediately to prevent instability or potential damage. Properly secured connections are crucial for both safety and optimal TV performance.
Safety Guidelines and Precautions
Always follow installation guidelines to prevent injury or damage. Ensure the mount is securely attached to the wall and consult a professional if unsure. Adhere to weight limits and instructions for a safe setup.
General Safety Tips
Always read the installation manual thoroughly before starting. Ensure the wall can support the TV’s weight and use appropriate screws for your wall type. Avoid mounting on metal framing or brick without proper hardware. Keep children away during installation. Use a level to ensure stability and test the mount’s weight capacity after installation. Never exceed the recommended load limit to prevent accidents and damage. Ensure all bolts and screws are tightly secured for a safe and stable setup.
Weight and Size Considerations
Ensure the TV’s weight and size match the mount’s specifications. Check the mount’s maximum load capacity to avoid overload risks. For large or heavy TVs, use reinforced brackets and consult a professional if necessary. Verify the TV’s VESA pattern compatibility to ensure proper fitting. Measure the wall space to accommodate the TV’s dimensions for a secure and balanced installation, preventing potential hazards and ensuring stability.
Electrical Safety Measures
Always ensure the TV is turned off and unplugged before starting installation. Avoid overloading circuits with additional devices. Use surge protectors for sensitive electronics. Keep cables organized to prevent tripping hazards. If installing near power outlets or complex wiring, consult a licensed electrician. Ensure all connections are secure to prevent short circuits. Adhere to local electrical codes and manufacturer guidelines for a safe setup.
Advanced Installation Topics
Explore specialized techniques for installing mounts on unique wall types, handling large TVs, and using additional hardware for complex setups.
Installing on Different Wall Types
For stud walls, use lag screws and washers to secure the mount. On brick or plaster walls, specialized hardware like anchors is required. Cinder block walls need verification of concrete thickness. Always ensure the mount is rated for the wall type and TV weight. For metal framing or unique structures, consult a professional. Proper installation ensures stability and safety, especially for large or heavy TVs. Follow specific instructions for each wall type to avoid damage or hazards.
Handling Large and Heavy TVs
For large and heavy TVs, ensure the wall mount is rated for the TV’s weight and size. Use reinforced mounts or additional support brackets to distribute weight evenly. Always check the mount’s load capacity and match it to the TV’s specifications. Consider using safety straps during installation to prevent accidents. Ensure the mount is securely attached to sturdy wall studs and leveled properly for balance. If unsure, consult a professional to guarantee a safe and stable installation.
Additional Hardware and Tools Needed
Besides the standard mounting kit, you may need lag screws, washers, and wall anchors for extra support, especially on non-stud walls. A stud finder, drill, and screwdriver are essential tools. For large TVs, reinforced brackets or additional support straps can enhance stability. Ensure all hardware matches the TV’s weight and VESA pattern. If installing on brick or concrete, specialized anchors like molly bolts may be required. Always verify compatibility with your wall type and TV specifications for a secure installation.
Troubleshooting Common Issues
Address alignment, leveling, and connection problems promptly. Check for loose screws, weight distribution, and VESA pattern compatibility. Ensure stability and re-tighten connections as needed for optimal performance.
Alignment and Leveling Problems
Ensure the TV is perfectly aligned and level during installation. Use a spirit level to verify the wall plate and TV are straight. If misaligned, adjust the mount or reposition the TV. Misalignment can cause uneven appearance or strain on the mount. Double-check VESA pattern compatibility and tighten screws evenly. If issues persist, consult the manual or seek professional assistance to avoid long-term damage or safety hazards.
Loose Connections and Screws
Loose screws or connections can compromise the stability of your TV mount. Regularly inspect and tighten all bolts and screws, especially after initial installation. Use a torque wrench to apply the correct pressure without over-tightening. Ensure all brackets and plates are securely fastened to both the TV and the wall. If screws become loose over time, re-tighten them promptly. Consult the manual for specific torque recommendations and consider consulting a professional if issues persist to prevent potential damage or safety risks.
Weight Distribution Concerns
Proper weight distribution is critical for safe and stable TV mounting. Always ensure the mount’s weight capacity exceeds your TV’s weight. For sturdy walls like wood studs, use lag screws with washers and anchors. On brick or plaster walls, specialized hardware may be needed. Ensure the mount is level to prevent uneven pressure on screws. Never exceed the maximum load, as this can lead to the mount failing. For large or heavy TVs, consider professional installation to ensure safety and proper weight distribution.
Mastery of TV wall mount installation ensures safety and optimal viewing. Always follow weight limits and consider professional help for complex cases. Enjoy your setup!
Start by reading the manual and gathering tools. Locate wall studs and drill securely. Attach brackets to the TV and mount the wall plate. Hang the TV, tighten all connections, and ensure stability. Double-check weight limits, leveling, and all screws. Test the setup before finalizing. For complex cases, seek professional help to avoid risks. Proper installation ensures a safe, sturdy, and visually appealing setup for years to come.
Maintenance and Upkeep Tips
Regularly inspect the mount and TV connections for tightness and wear. Dust and clean the mount to prevent corrosion. Check for any wall damage or stud movement that might affect stability. Ensure the weight distribution remains balanced and within limits. Avoid over-tightening screws to prevent damage. Schedule annual checks, especially in earthquake-prone areas. Replace worn-out parts promptly. Keep the manual handy for reference. Proper upkeep ensures long-term safety and performance of your TV mount.
Where to Find Additional Resources
Visit the manufacturer’s official website for detailed PDF guides and troubleshooting tips. Online forums and DIY communities offer shared experiences and solutions. Retailers like Amazon provide installation manuals and customer reviews. YouTube tutorials demonstrate step-by-step processes. Hardware stores often host workshops or provide expert advice. Consult local professionals for complex installations. Ensure all resources align with your specific mount model and wall type for accurate guidance and safety.